
Paper bead tips, tricks and free printable designs for you!
Since my last blog post and video about my new paper bead strip templates, I have been really busy.
My passion for paper beading has been reignited by making the video about using my new template.
You can read the associated post here.
Just to let you know before you read on – there are some Amazon Affliate links to craft supplies in this post – here is my Amazon Affliate Statement.
Paper bead tips are always fun, especially when they help speed up the process.
The tips and tricks I have for you today have really have sped up the paper bead making process for me.
Having the plastic template to draw out the strips has been the biggest game changer for me.

The fact that my paper bead strip template is transparent makes drawing the bead strips mega fast.
As far as drawing paper bead strips goes, my No 1 tip of all paper bead tips is, get my transparent template!
The link to my Etsy shop is directly under the picture of the template in my hand, above.
Or you can can click here to go to my etsy shop as well.
I am really fast at drawing my strips now and, they are all lined up so neatly, I amaze myself! 😉

I cut the tops and bottoms off all strips in two swift cuts before I start cutting each individual strip.
The secret? It’s having the bottom of the paper bead strip template lined up perfectly with the bottom of the paper.

That gives you perfectly aligned paper bead strip outlines that allow you to cut across the tops and bottoms in one block.


And those waste strips? Well they aren’t waste! I use all my side, top and bottom off-cuts to make odd size paper beads.
Same with the skinny off-cuts from in between your main strips – they make great spacer beads!


All the four bracelets I made in my latest video were all made with the one inch beads interspersed with odd sizes.

And I love how that looks.
So those were a few paper bead tips to do with my new template.
I know that maybe I am biased because I created the paper bead strip template, but it really is a brilliant way to draw out your strips in eight different size choices.
Just sayin’! 😉
The next paper bead tips are to do with rolling the strips into beads.
If you read my last post and watched the tutorial, you will know I shared an idea for making a super fantastic paper bead rolling tool.

And in my latest video, I have some more paper bead rolling tool hacks, just in case you want something simpler.
These next tips are for creating makeshift bead rollers that won’t break the bank.
And if you have any paper bead making friends, you could club together to get the couple of items you will need.
For example, the slotted spring pins I linked to in my Amazon shops come in packs of 5 and you only need one.
That goes for both the 3mm and the 5mm pins.
So you could share the cost of the packets of spring pins and divide them up between you.
And you only need the slotted spring pin for one of the bead tool hacks I show in the video.
The second makeshift bead tool doesn’t even need a slotted pin but it works like a dream!
This first tip takes us all the way back to the days in the 70s when we were using toothpicks to role paper beads.
Except we aren’t using a toothpick this time because toothpicks are too small and fiddly for lots of us.
Also, the core hole they create is tiny, which is useless if you want to make European style paper beads or beads with a smaller hole, but not that small!
So what can you buy, cheaply, that will give you a core hole in practically any size you want?
Knitting needles of course! Specifically, half size double ended metal knitting needles.

I know what you’re thinking!
How is this any better than rolling with a tooth pick?
Ok, so the core hole size choice is a big step forward but what about the lack of a slot to catch the end of the paper bead strip?
Aha! This is where the very simple hack comes in but you’ll have to watch the video to see what you need to do.
My second bead rolling tool tip also involves knitting needles.
But for this one, I used this big pack of stainless steel needles I got on Amazon.


Once again, if you have friends who make paper beads and who want to try these paper bead tips, you could easily share the cost.
And these packs aren’t expensive anyway.
And, I cut my needles in half for this project, so one pack would do for a whole group of paper beaders.
This is the workaround where you also need one of the slotted spring pins.
And the reason I bought the pack of knitting needles in so many assorted sizes is because I wanted the obscure half sizes in the pack.
Specifically, I wanted the 2.5mm and 4.5mm sizes.
Because I suspected they would push securely into the 3mm and 5mm slotted spring pins.
Obviously the internal diameter of the pins is slightly smaller which is why I wanted the half sizes.
And it worked! Pushing the metal knitting needle into the slotted pin extends it and forms a handle.

I’m not that keen on skinny paper bead tool handles which is why I always made chunky handles.
However, I am surprised at how comfortable this makeshift paper bead tool is to use.
The knitting needle extends right into the palm of your hand so you can brace it there while rolling the beads.
So if you can’t get hold of the red collet chuck handles I suggested in my last video – this will work instead.
My next paper bead tips come from an experiment I did with my painted tissue paper.
You may have seen my earlier video about making beautiful painted papers using wet strength tissue.

Well, I did wonder if I could make paper beads from those painted papers.
So I did exactly that. And I used my new template to draw out my strips.
So my first tip is, if you try this with your painted papers, use the finest fineliner black pen to draw your lines.
Because pencil doesn’t show up very well for some reason.
And also, when you are going to cut your strips, use scissors instead of a craft knife.
Even a fresh new blade in my scalpel was snagging the tissue because of the texture.
The texture I had created by screwing up the tissue made the paper resistant to the blade.
I was able to cut it with a blade, but not very easily and the paper did pucker and tear at one point.
Scissors, however, cut the tissue beautifully.
Watch the video to see how my beads turned out and what my verdict was on the experiment.
And my final paper bead tips are these.
If you use my free printables, don’t just use regular copy paper.

Use a really good quality copy paper made for printing color documents
This is the paper I use and I get it from Tesco in the UK but it’s also available on Amazon.
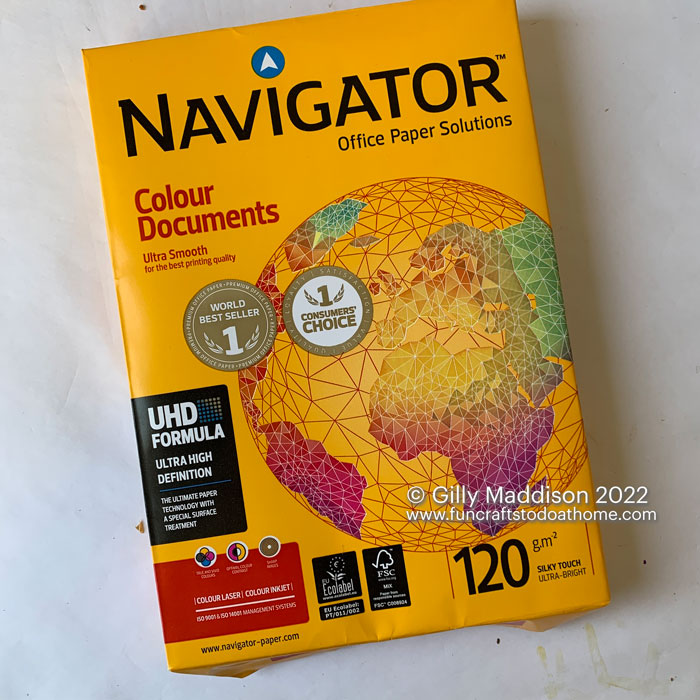
This one is made for printing colour documents and gives good color reproduction.
Well, it does on my printer but obviously I can’t speak for all printers.
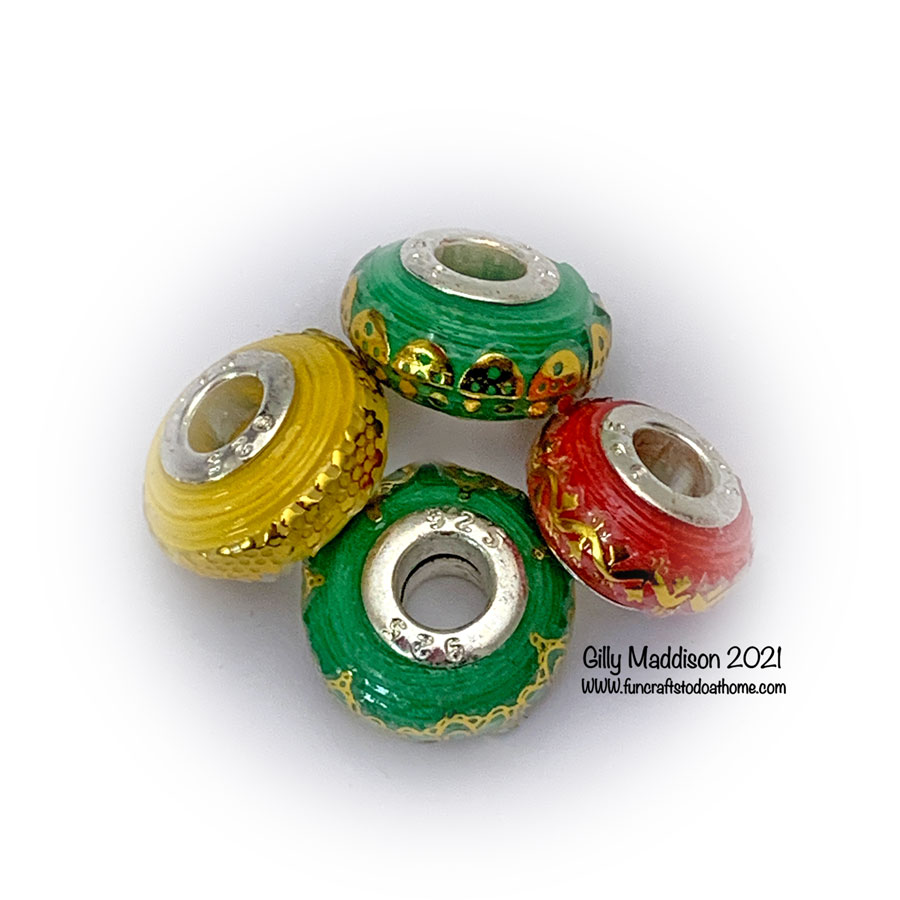
And once you have cut your strips, there is a hack that I thought of this week to color the bead strip edges faster.
Why do I color the edges anyway?
Well when you roll a bead strip, if you haven’t colored the cut edges, you get a white line spiralling round the bead.
If you don’t want that, then you need to color the edges before you roll the bead.
What color you use depends on the color scheme of your paper.
I often use a gold metallic marker.
And I love the Artistro brand markers because they are juicy and long lasting.

The trick I thought of to speed up the task of getting all those strips colored was to clamp the marker in a vice.
You can see what I did in my video – it worked so well and has really sped up my edge coloring by A LOT!
It gave me a reason to dig out my old table vice which was gathering dust in the shed.

And table vices aren’t that expensive.
I am so glad I had that brainwave because it’s so much easier having the pen clamped so you can just run your strips along the marker tip.
Mine came from Machine Mart in the UK, a birthday present from my son because I needed one for some projects at the time.
A home table vice is definitely a handy thing to have in your arsenal of craft tools.
So what free printables do I have for you today?
Well I have these three original designs for you in A4 JPG and PDF formats.
The link to them on my Google drive is in the caption directly under this picture.

The free printables are stored on Google Drive because having lots of full size images on here would slow my website down.
The printables are completely free to download and use – but there are a few Terms & Conditions to using them.
There aren’t many, but please respect them.
I have many more printables listed over on my free printables page.
If you have any questions, you can contact me via social media – the links are in the caption directly below this image.

Were my paper bead tips and tricks helpful?
I hope so!
If you have problems finding any of the craft supplies I use in my videos,
check out my Amazon storefronts.
Thank you for reading this post – why not subscribe here so you get all my free printables as soon as they are published?
Your email address will not be used for anything other than letting you know when I have a new post.
That’s it – nothing else!
Bye for now and see you again soon.