DIY Halloween decorations ideas for you to try – it’s very easy!
Easy DIY halloween decorations just for you.
And not just easy – also very inexpensive to make because…Ta dah! …they are made from bread!

Warning – these decorations ARE NOT EDIBLE!

This is a brief step by step guide to get an idea of how to make these cute decoration.
For a more detailed explanation – watch the video I made for you.
So, what supplies will you need to make these easy DIY Halloween decorations?
Please note: If it is difficult to get the items I use in my posts, don’t worry! I have two Amazon stores where you can find most of what you see me using here.
You can find my stores by clicking on the links below:
https://www.amazon.co.uk/shop/rainbowlane
https://www.amazon.com/shop/rainbowlane
All items were available at the time of writing but this may no longer be the case.
You will need:


And how do you make the easy DIY Halloween decorations?
Step 1:
Use your Halloween cookie cutters to cut creepy Halloween shapes out of thick, soft, white bread.

Step 2:
Use a hole punch like the one below to easily cut a neat hole in each shape while the bread is still soft.

Problems finding a metal hole punch?
You will find the Dovecrafts tool set in my Amazon stores – see links to those higher up this post.
Each set has one of these tools with three different size holes punches to screw on.


Using a hole punch makes your decorations look so much neater and more professional.
Step 3:
The secret to making sure these halloween decorations last for years is to air dry them until they are crisp. I leave mine on a drying rack for 48 hours.
You will need to dry your shapes thoroughly until the bread is rigid and makes a tapping sound when you tap it against the table.


Step 4:
Use orange, black and green paint to paint your air dried shapes. I used bright orange from Hobby Craft in the UK to paint my pumpkin shapes and green for the stalks. I used black for the bats, the houses, the witch’s hats and the spiders.
And I used white for the little ghosts.
If you don’t have a craft store nearby, I do have acrylic paints in my Amazon stores too – but do try to shop locally if you can.

Step 5:
Once again, you need to dry out your painted Halloween bread shapes very thoroughly to make sure they will last for years to come.
I use an easy method which means I can paint the fronts, backs and edges all in the same session, as opposed to having to paint one side and let it dry before painting the rest of it.
The method is this – I use a block of florist’s oasis and some bamboo kebab sticks to let my pieces air dry.

Step 6:
As soon as the paint is completely dry, you can go ahead and seal the decorations with a glossy glaze such as Mod Podge Super Gloss Brilliant.

And also on my Amazon.com supplies page
Step 7:
Once the glaze is thoroughly dry on your Halloween decorations, it’s time for the exciting part – adding the finishing touches that will turn your shapes into scary Halloween decorations.

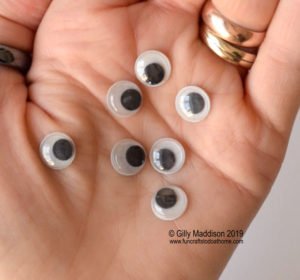
When I made these ones, I added tiny little red gems to create creepy red eyes on the cats and bats. I added purple eyes to the spiders and googly eyes to the pumpkins. The pumpkins don’t look scary with googly eyes, they just look a little crazy!


You can also add glitter to your Halloween decorations to add some sparkle.
I added a line of red glitter along the edge of the witch’s hats

Did you enjoy this post about easy DIY Halloween decorations?
If you did, why don’t you check out my post about Christmas decorations?
Or watch the video showing how to make Christmas decorations from bread by clicking here.
There are more posts coming up very soon showing you how to make Christmas decorations really easily from paper.
I also have a free downloadable printable of I inch circular designs in autumn colors coming up really soon – below are four of the 15 free designs I will be posting on here.
There will also be a step by step in a video showing how to make the gorgeous charms you see here.

So to make sure you get your free printable of these designs, subscribe to this blog today and you will get an email as soon as I post the designs on here for you to download.
Have fun making your easy DIY Halloween decorations and see you again very soon with more projects for you to try out.